Online Manual - GRS008
2 . Before Use
2-1 . Names of the parts
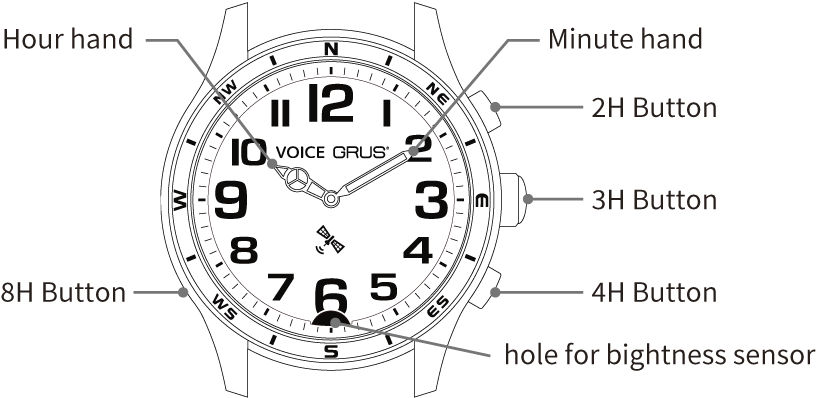
Front side
- Long hand is minute hand.
- Short hand is hour hand.
- Upper right button is 2H button.
- Center right button is 3H button.
- Lower right button is 4H button.
- Lower left button is 8H button. This 8H button is flat because it is not used on a daily basis.
- here is a hole for brightness sensor at under the 6 hour position
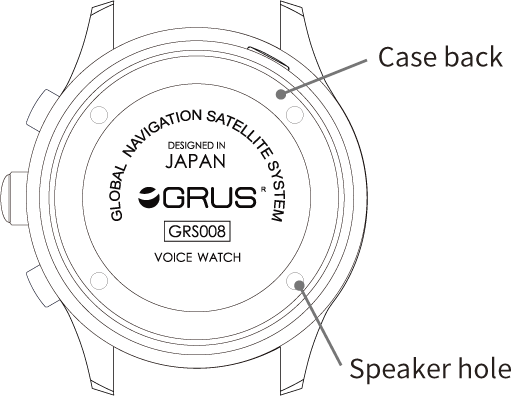
Rear side
- The cover behind the watch is called case back.
- Four holes for sound put in the case back.
The case back has following engraved letters:
- GLOBAL NAVIGATION SATELLITE SYSTEM.
- DESIGNED IN JAPAN
- GRUS : Brand name
- GRS008 : Model number
- VOICE WATCH : Product name
2-2 . Button operations and behavior table
Table for the behavior when each button is pressed either once or holding down more than 3 seconds.
- Press once 2H button
- To announce the current time of hour and minute
- Press once 3H button
- To beep sound for illuminance
- Press once 4H button
- To announce month/day/the day of the week
- Press once 8H button
- To start the receiving time signal (Force receiving)
- Hold 2H button down more than 3 seconds
- To announce the reception status
- Hold 3H button down more than 3 seconds
- To go to setting mode
- Hold 4H button down more than 3 seconds
- To go to silent mode ON/OFF
- Hold 8H button down more than 3 seconds
- To set language and time zone (time difference)
2-3 . How to wear the band and band size adjustment
The strap is adopted a special buckle called a double-push three-fold buckle slide adjuster. You can use the band in the same arm circumference condition from the next time you wear by simply fastening the slide adjuster at the position of the band length that matches your arm circumference. When you want to adjust the length of the band, simply slide the adjuster.
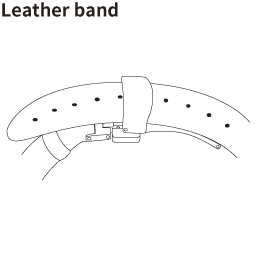
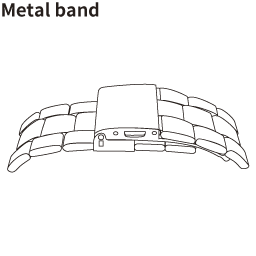
There are two types of band, leather band and metal band. It is similer to deal with both of buckles, but the shapes are different.
How to wear the band
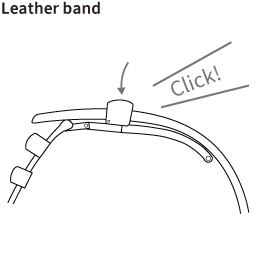
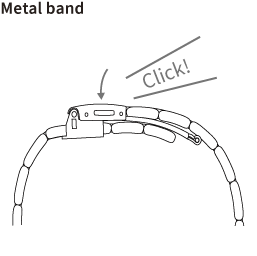
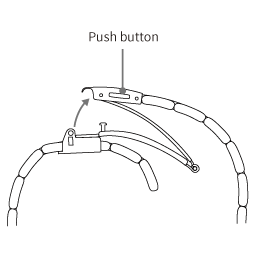
1. Push the clasp buttons from both sides at the same time. The buckle is pulled up automatically and the band expands.
2. Put your arm through the band. While folding intermediate plates , push the buckle firmly into the part of clasp buttons until you hear a click. Regarding leather band, insert the band to loops if the edge of band is too long.
Band size adjustment
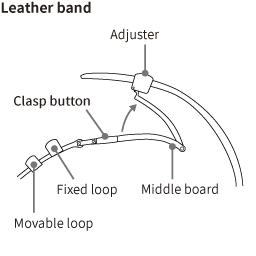
Adjustment for leather band
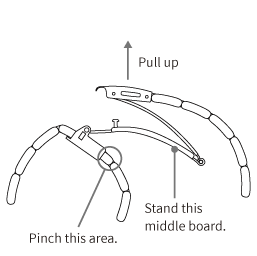
1. Push the clasp buttons from both sides at the same time. The buckle is pulled up automatically and the band expands.
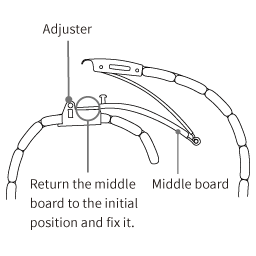
2. Pull up the upper adjuster in the direction of the sword tip of the belt and remove the pin from the hole in the belt.

3. Decide the position and insert the pin of bottom part of buckle while sliding the buckle. The more the strap is close to the watch head, the more the band size become smaller.
4. Fasten the top and bottom of adjuster like pinching until you hear a click.
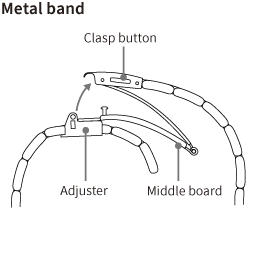
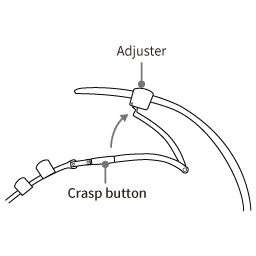
Adjustment for metal band
1. Push the clasp buttons from both sides at the same time. The buckle is pulled up automatically and the band expands.
2. Open the adjuster by pulling the bottom of adjuster down. It may be slightly different the tention of adjuster with depending on adjuster position.
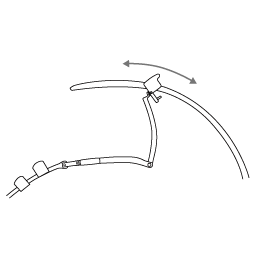
3. Stand vartically the intermediate plates attached pin to the adjuster, and decide the position while sliding the buckle. The more the strap is close to the watch head, the more the band size become smaller.

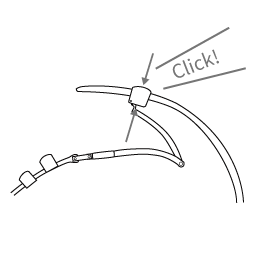
4. Fasten the bottom of adjuster like pushing up. If there is almost nothing tention, move the adjuster position just a little.